Getting Started with Bumblebee X in Matrox Design Assistant
Overview
This application note describes using the Bumblebee X stereo camera in Matrox Design Assistant.
For other GigE or USB3 cameras used in Matrox, please see these other application notes:
Getting Started with Matrox Design Assistant
Getting Started with Matrox Imaging Library
Using USB3 Vision Cameras in Matrox Imaging Library
Preparing for Use
Before you use your Bumblebee X camera, we recommend that you are aware of resources available from the product webpage, including:
- Getting Started Manual for the camera—provides information on installing components and software needed to run the camera.
- Technical Reference for the camera—provides information on the camera’s specifications, features, and operations, as well as imaging and acquisition controls.
- Firmware updates—ensure you are using the most up-to-date firmware for the camera to take advantage of improvements and fixes.
Installation and Configuration
Matrox Design Assistant 4.0 supports USB3 Vision and GigE Vision cameras. The following instructions focus on GigE for the Bumblebee X.
Step 1--Install Design Assistant
Download Design Assistant from the Zebra Website (Matrox Imaging software is now rebranded as Aurora) and follow the installation instructions.
During the installation process, select GigE Vision support.
Step 2--Connect the Camera to the PC
Connect the Bumblebee X camera to the PC. You can power over GPIO or over PoE.
Note: using a 1GigE PoE adapter drops the maximum link speed.
For information, see the Bumblebee X Getting Started Manual.
Step 3--Start Design Assistant
To start Design Assistant:
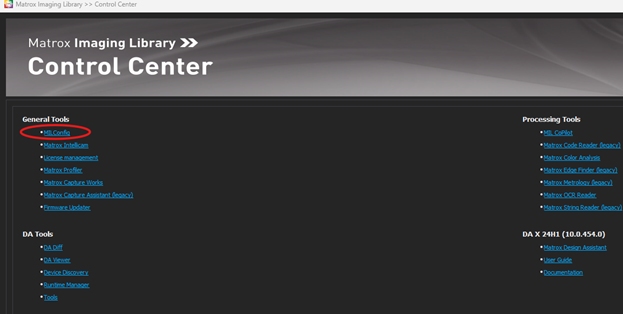
1. Launch Matrox Imaging Library Control Center.
Start Menu → All Programs → Matrox Imaging Library → Matrox Imaging Control Center.
2. Under Design Assistant X (DA X), click Matrox Design Assistant.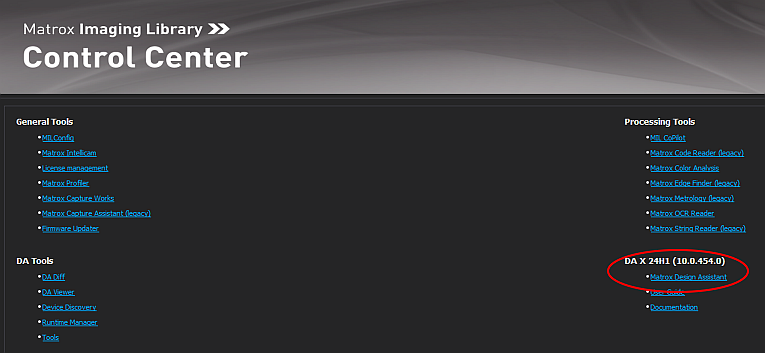
3. Open a project.
- To open an existing project, on the Start Page, click the Open Project icon.
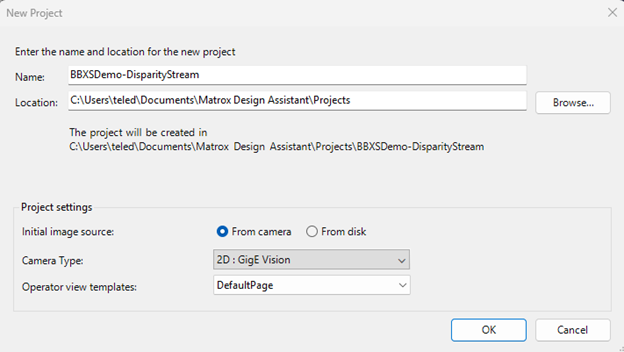
OR - To start a new project, click New Project, Select Connect Local, enter the project name and click OK.
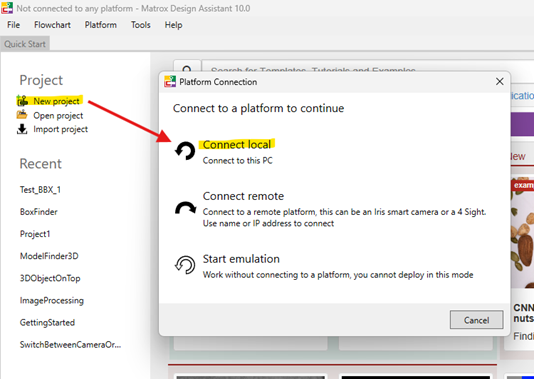
Design Assistant configures the system and allocates a camera.
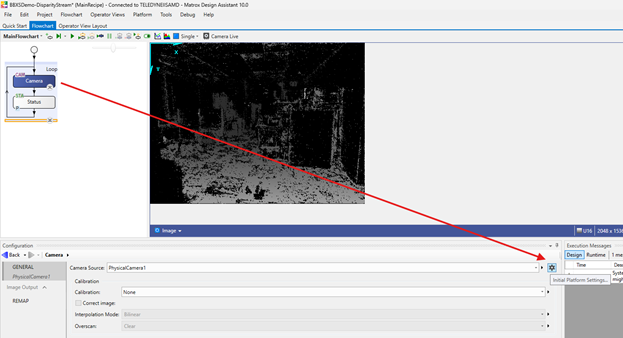
Step 4--Configure Initial Camera Settings
By default, the BumblebeeX camera streams multiple streams at the same time. Matrox can not handle this, so as a requirement to run the Bumblebee X camera in Matrox, you first need to disable all streams except the one you want. Usually, this would be the disparity image if you want to convert to a depth map.
To configure camera settings:
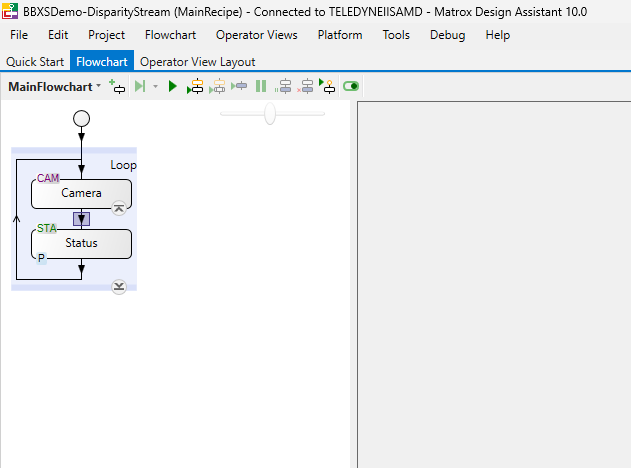
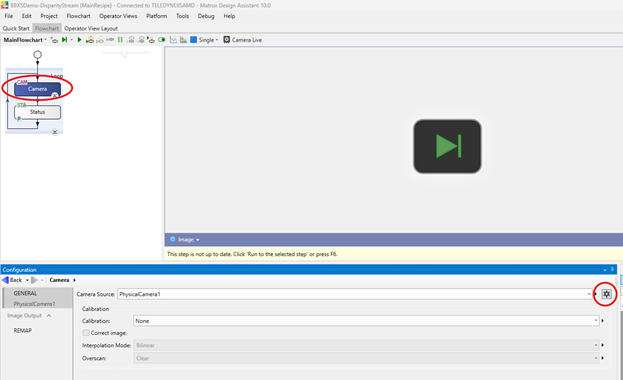
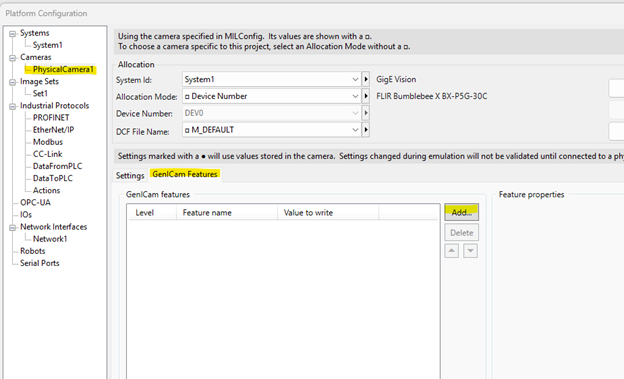
1. Select the Camera node and click the InitialPlatformSettings icon.
2. Select the camera in the tree, then select the GenICam Features tab. Select Add to add a feature to change.
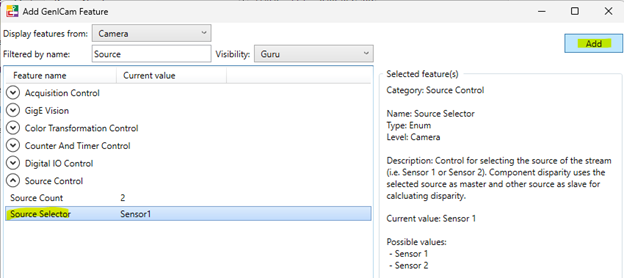
3. Select the camera attribute, change the value, and click Add.
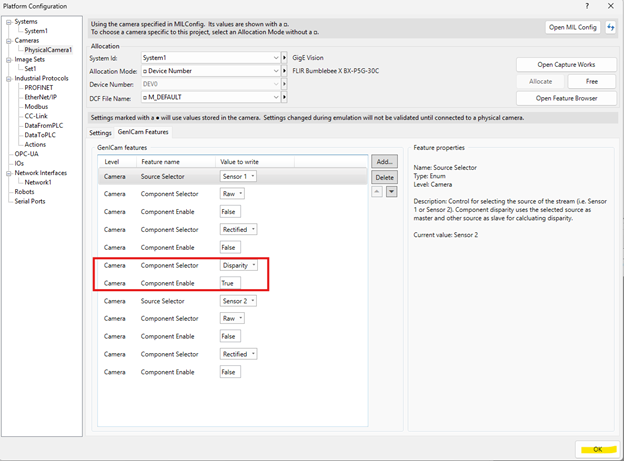
Adding the Sensor source selector:
Adding the Component selector and component enable nodes:
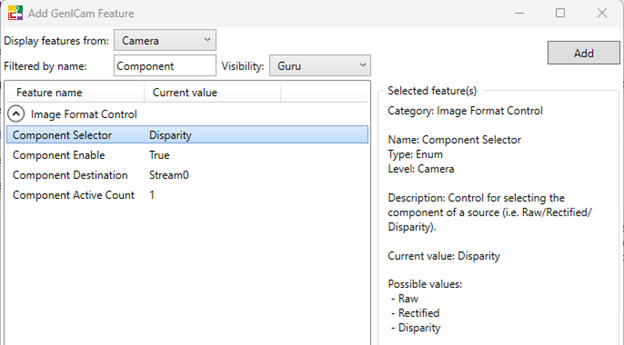
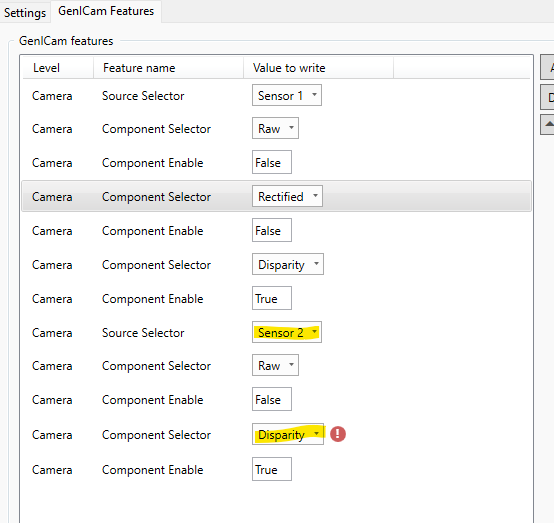
For the BumblebeeX camera, to configure it to stream only the disparity image from the camera, use the following camera settings:
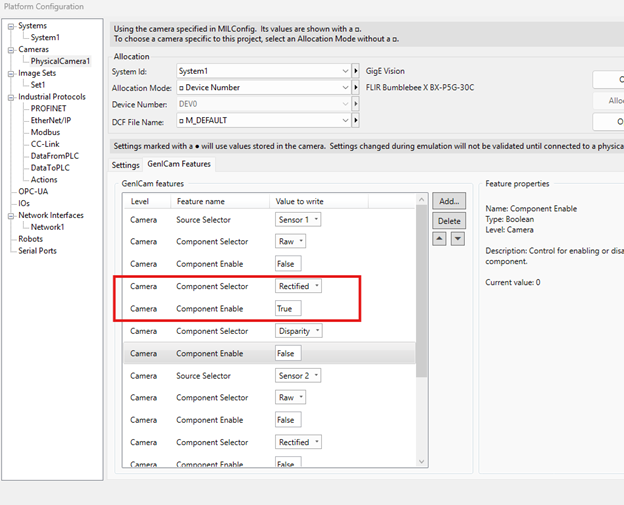
If instead you wish to stream the rectified image from one of the sensors, enable it for the correct sensor. Remember to set Disparity to False before you enable Rectified.
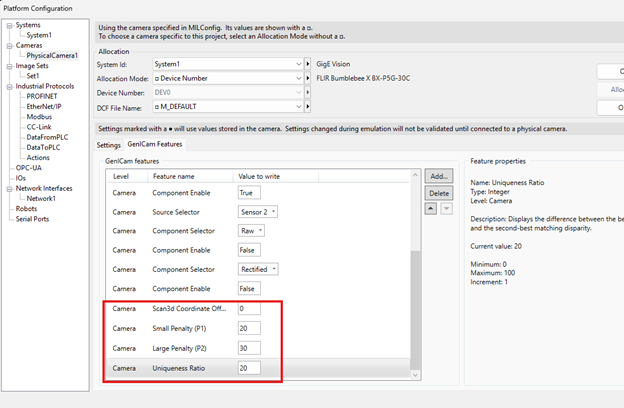
Add these attributes to allow you to change the stereo parameters as you try to configure them to get the best stereo for your scene.
Step 5--Start Acquisition
For a quick preview of the live camera, select the Camera live button.
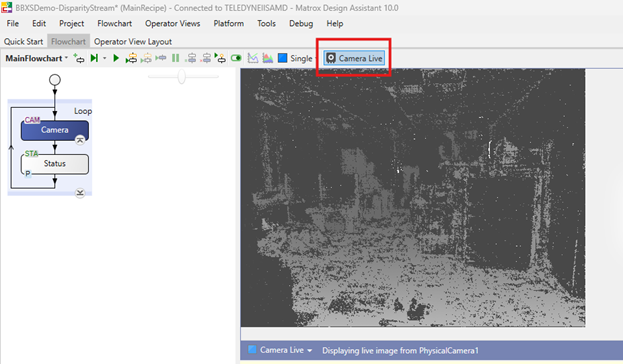
To start acquisition of your application, click the Run button or press F5.

Troubleshooting
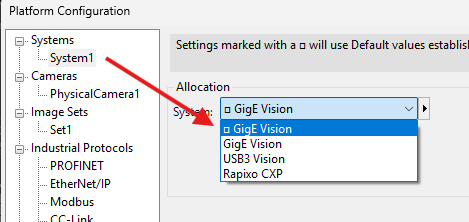
How Do I Correct a Camera Allocation Error?
If your camera has an allocation error, you may need to set the Initial Platform Settings to the correct system.
To adjust your settings:
1. In the Flowchart window, select the Camera node.
2. Click Initial Platform Settings and browse to System1 tab.
3. Set your system to the appropriate camera:
- To stream a GigE Vision camera, set your system to GigE Vision.
- To stream a USB3 Vision camera, set your system to USB3 Vision.
Ensuring the camera is connected
To make sure the BumblebeeX camera is connected, you can also use the legacy MILConfig tool to quickly verify Matrox sees the camera and can stream (after changing the above stream settings to ensure only a single stream is being sent out).
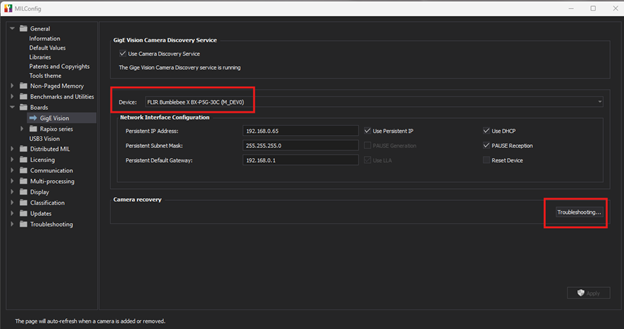
The camera doesn’t enumerate
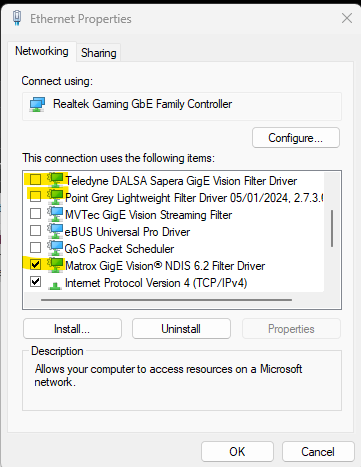
If the Bumblebee X camera is still not showing up, please ensure the Matrox GigE driver is installed as a service on the NIC, and disable the Teledyne Sapera GigE driver and the LWF driver.
I get an error trying to enable disparity
There is only 1 disparity output from the Bumblebee X camera because it combines images from both sensors. For the BumblebeeX, the Disparity component is only available under Sensor 1. If you try to set the Component Selector to Disparity when you can Sensor 2 selected, there will be an error icon in Design Assistant.
To resolve, enable disparity only when Sensor 1 is selected.
The following additional suggestions may help you troubleshoot issues with your camera
- Update the driver to the latest version.
- Update the firmware to the latest version.
- Update the software to the latest version.
- Perform a soft reboot and if still necessary a hard reboot of the PC.
- Disable then enable the driver.
- Power cycle the camera. The following additional suggestions may help you troubleshoot issues with your camera.
- Power the camera through GPIO, if wiring harness is available.
- Use a separate host controller instead of an integrated one, if available.
- Ensure the card is powered via the 4-pin hard drive connector, if applicable.
- Use a different cable or host controller or PC.