Replacing Your Ladybug Window Retainer
The Ladybug window retainer replacement kit is available for users who wish to replace a damaged window retainer. It cannot repair damage to the glass or baffle.
There are two kits available, depending on your Ladybug model:
- ACC-01-0022: for Ladybug6 cameras
- ACC-01-0021: for Ladybug5+ cameras
This kit is meant for cameras that are out of warranty. If your Ladybug camera is still under warranty, return it to Teledyne FLIR for repair.
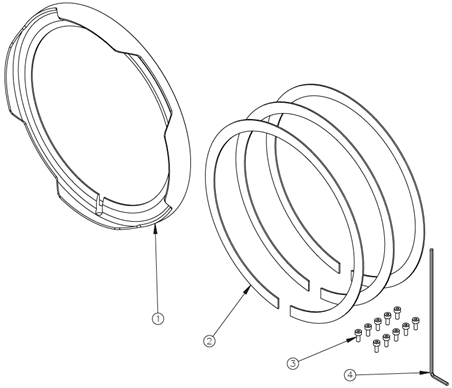
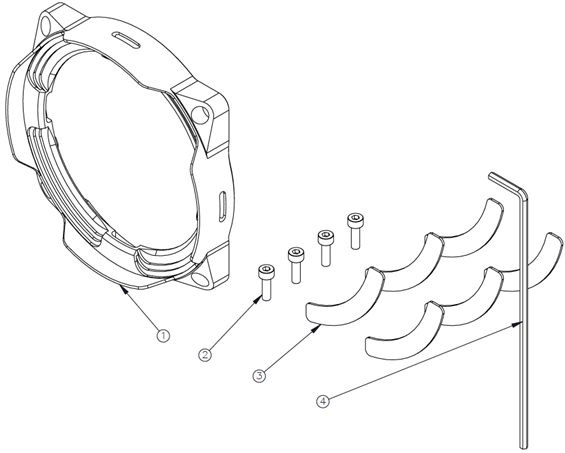
Parts Included in the Kit
| ACC-01-0022 Ladybug6 | ACC-01-0021 Ladybug5+ |
|
|
 |
 |
Parts Needed for Installation
- Loctite 222MS
- Soft, dust free cloth
- Isopropyl alcohol (optional)
Warnings
- Use of this kit invalidates the camera’s warranty; it is meant for out of warranty cameras.
- Avoid opening the cover glass. Opening it could expose the camera to dust, dirt, or moisture that may affect the camera’s operation.
- Do NOT over torque the screws. Over torquing can damage the screws, the retainer, or the camera body.
Preparation of the Workspace
Before beginning the installation, ensure you have:
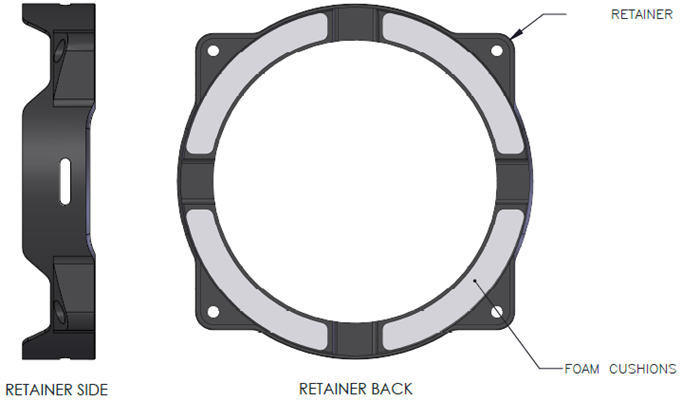
- All the kit parts: retainer, screws, cushions, hex key
- Loctite 222MS (not included in the kit)
- Soft, dust free cloth for cleaning the glass
- Isopropyl alcohol for cleaning the glass (optional)
We recommend that you work in a dust free environment with a flat surface that is covered with a soft, dust free cloth. If you have a desktop mount for your Ladybug camera, working with the camera mounted may be easier.
Ladybug6 Installation
(Jump to Installation for Ladybug5+)
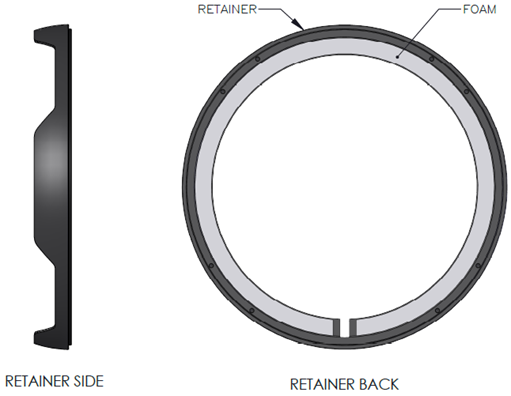
1. Attach foam cushion on the back of the retainer. Only one cushion is required; the kit contains three cushions in case any get damaged during installation.
Carefully peel the adhesive liner off the foam and place adhesive side down on the back side of the retainer. The non-adhesive side will face the glass when installed.
Align the slit on the foam with the drain of the retainer. Keep the foam close to the outer edge so it does not protrude over the glass during the installation to the camera.
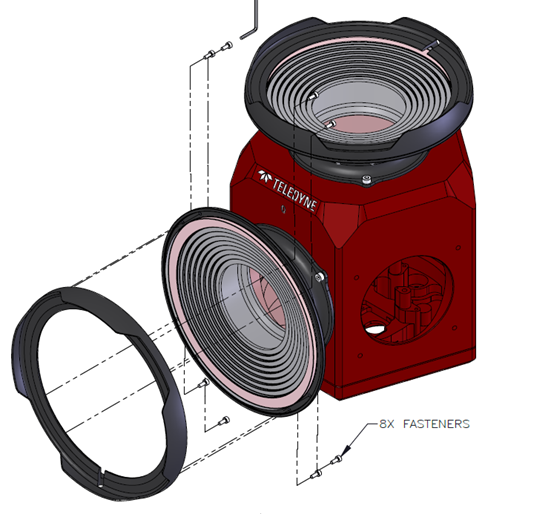
2. Mount the camera if using a mount, or lay it on the flat surface so the retainer being replaced is as face up as possible.
3. Remove the eight screws holding the old retainer. Hold and gently press on the glass when pulling off the old retainer. Be careful not to damage the glass and baffle while removing the old retainer.
4. Apply Loctite 222MS to the first three threads of the new screws. Eight screws are required; the kit contains ten screws in case any get lost.
5. Install the retainer and fasten the screws finger tight using the hex key.
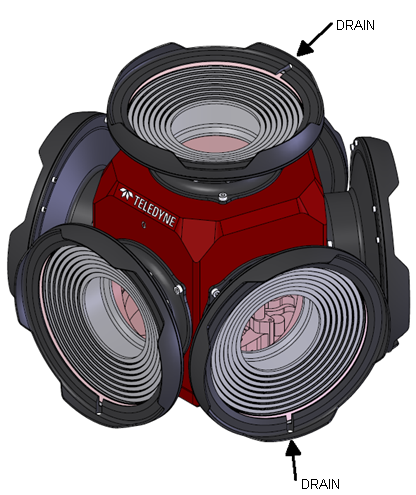
Note: the screw pattern of the retainer is not symmetric. It will only install one way. For side mounted retainers the drain faces the bottom of the camera. For the top mounted retainer the drain faces the Teledyne logo (not the text).
6. Torque the screws by turning the hex key by 1/8 (minimum) to 1/4 (maximum) of a turn from finger tight. Do NOT over torque the screws.
7. Clean the glass with a soft, dust free cloth. If necessary, use isopropyl alcohol.
Ladybug5+ Installation
1. Attach four foam cushions on the back of the retainer. Only four cushions are required; the kit contains six cushions in case any are damaged during installation.
Carefully peel the adhesive liner off the foam and place adhesive side down on the back side of the retainer. The non-adhesive side will face the glass when installed.
Do not cover the drain holes. Keep the foam close to the outer edges so it does not protrude over the glass during the installation to the camera.
2. Mount the camera if using a mount, or lay it on the flat surface so the retainer being replaced is as face up as possible.
3. Remove the four screws holding the old retainer. Hold and gently press on the glass when pulling off the old retainer so that the baffle does not also come off.

4. Apply Loctite 222MS to the first three threads of the new screws.
5. Install the retainer and fasten the screws finger tight using the hex key.
Note: the bolt opening of the retainer are not symmetric. They are slightly wider on the top and the bottom.
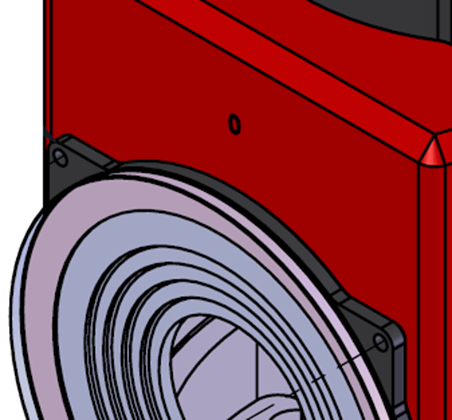
6. Check the gap between the baffle and the camera body. It should be flush and even. If there are gaps or unevenness bewteen the baffle and the camera body, loosen the screws, position the baffle, and tighten again.
7.Torque the screws by turning the hex key by 1/8 (minimum) to 1/4 (maximum) of a turn from finger tight. Do NOT over torque the screws.
8. Clean the glass with a soft, dust free cloth. If necessary, use isopropyl alcohol.