Getting Started with Bumblebee X in MVTec HALCON
Overview
This application note describes using the Bumblebee X stereo camera in MVTec HALCON.
For other GigE or USB3 cameras used in MVTec HALCON, please see these other application notes:
Getting Started with MVTec HALCON
Using USB3 Vision Cameras with MVTec HALCON 11 in Windows
Using USB3 Vision Cameras with MVTec HALCON in OS X
Preparing for Use
Before you use your Bumblebee X camera, we recommend that you are aware of resources available from the product webpage, including:
- Getting Started Manual for the camera—provides information on installing components and software needed to run the camera.
- Technical Reference for the camera—provides information on the camera’s specifications, features, and operations, as well as imaging and acquisition controls.
- Firmware updates—ensure you are using the most up-to-date firmware for the camera to take advantage of improvements and fixes.
Installation and Configuration
Step 1--Install MVTec HALCON
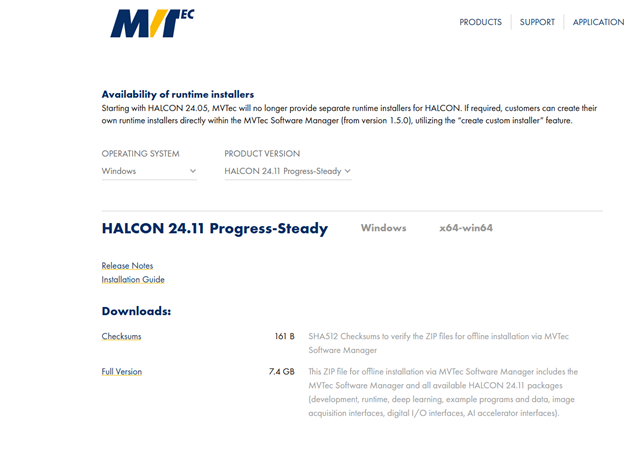
MVTec Halcon HDevelop is available for download from the MVTec HALCON website. You must be a registered user to download the software. This application note used Halcon 24.11 Progress-Steady.
1. Choose the Windows operating system, and the latest Halcon Product Version.
2. Unzip the downloaded package and from the folder location, double-click the “som.exe” file. It opens a browser tab in your current active browser.
3. Choose custom installation. For Package selection, make sure that GigEVision2 and GigEVision Filter Driver are both selected.

4. Follow the instructions to complete installation.
Step 2--Connect the Camera to the PC
Connect the Bumblebee X camera to the PC. You can power over GPIO or over PoE.
Note: using a 1GigE PoE adapter drops the maximum link speed.
For information, see the Bumblebee X Getting Started Manual.
Note: the camera and host IP addresses must be properly setup to match. This can be done by forcing the IP in SpinView, or by enabling persistent IP on the camera.
Step 3--Connect the Halcon Dongle to the PC
A current Halcon Dongle acts as a license for the software, allowing for its use. The license file should be added to the license folder in the MVTec directory:
C:\Users\UName\AppData\Local\Programs\MVTec\HALCON-24.11-Progress-Steady\license
Step 4--Start HDevelop and Detect the Camera
To start HDevelop:
1. Launch the HDevelop application.
Start Menu→All Programs→MVTec HALCON 11→HDevelop
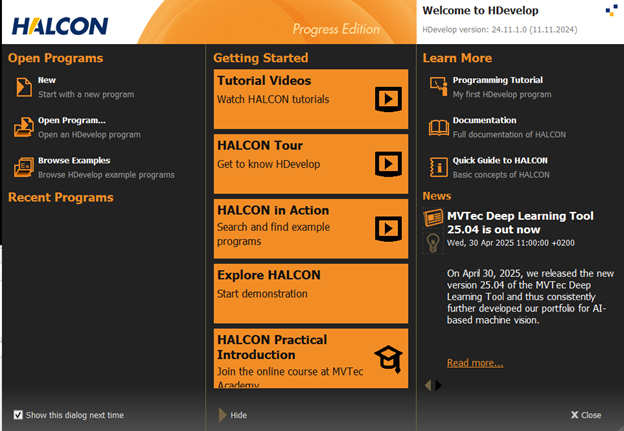
2. Close the Welcome to HDevelop dialog.
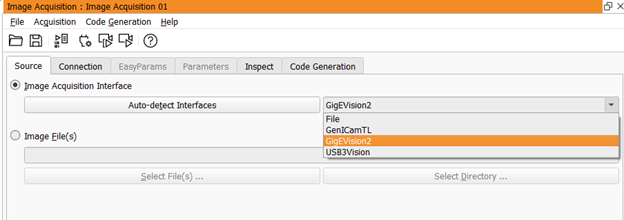
3. In the HDevelop main window, select Assistants->Open New Image Acquisition.
4. From Image Acquisition Interface Source, select GigEVision2.
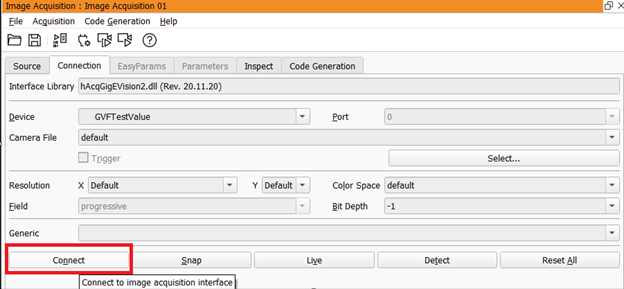
5. On the Connection tab, click Connect.
6. On the Parameters tab, set category to All Parameters, and set visibility to Guru.
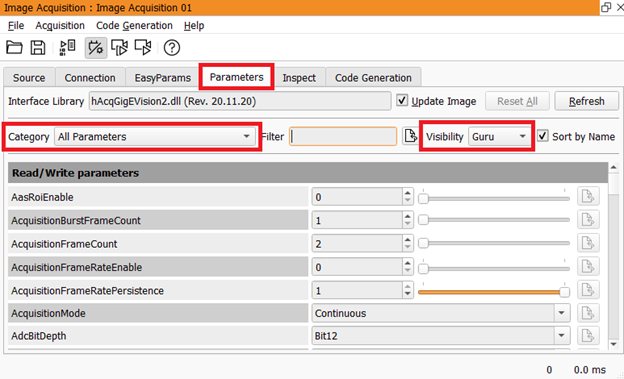
Now you have full access to the camera’s node tree, similar to the Features tab in SpinView.
Step 5--Stream from the Camera
Before a user begins streaming from the camera, in the parameters tab, search for “component”;change component selector to “rectified”, then set Component Enable to “0”. This should ensure that the application will only try to display a single stream; you can confirm this by showing that the “Component Active Count” is set to 1. Once confirmed, you can try streaming from the by going to the “Source” tab and select “live”.
1. On the Parameters tab, search for "component."
2. Change the Component Selector to Rectified.
3. Set Component Enable to 0.
4. Verify Component Active Count is 1.
This ensures the application only displays a single stream.
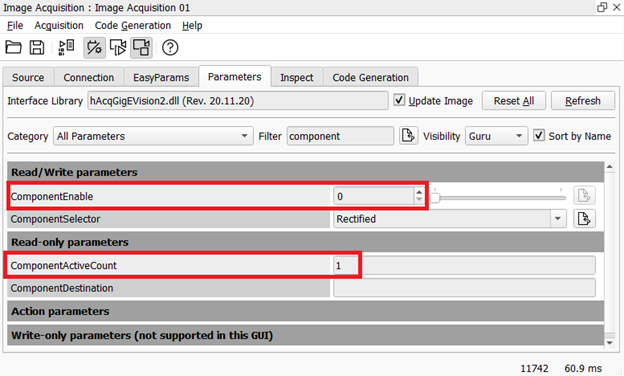
5. On the Source tab, select Live.
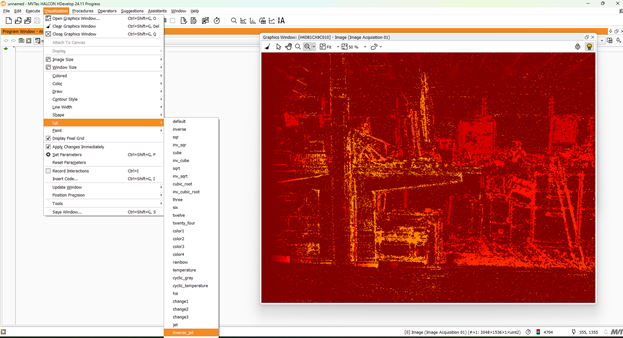
The HDevelop default LUT makes it hard to see the disparity stream.
From the Visualization menu select LUT, then select another option. This example uses inverse_jet.
Related Articles
-
 Application Note
Getting Started with MVTec HALCON
Más información -
Application Note
Using USB3 Vision Cameras with MVTec HALCON 11 in Windows
Más información -
Application Note
Using USB3 Vision Cameras with MVTec HALCON in OS X
Más información